Build a flow on the canvas#
Add blocks, drag a connection from an output port to an input port, then set each block up.
A flow takes three steps to build: drop blocks on the canvas, connect them port to port, and configure each one in the inspector. This page covers the mechanics. Every flow begins with a Start trigger already in place, so you build outward from there.
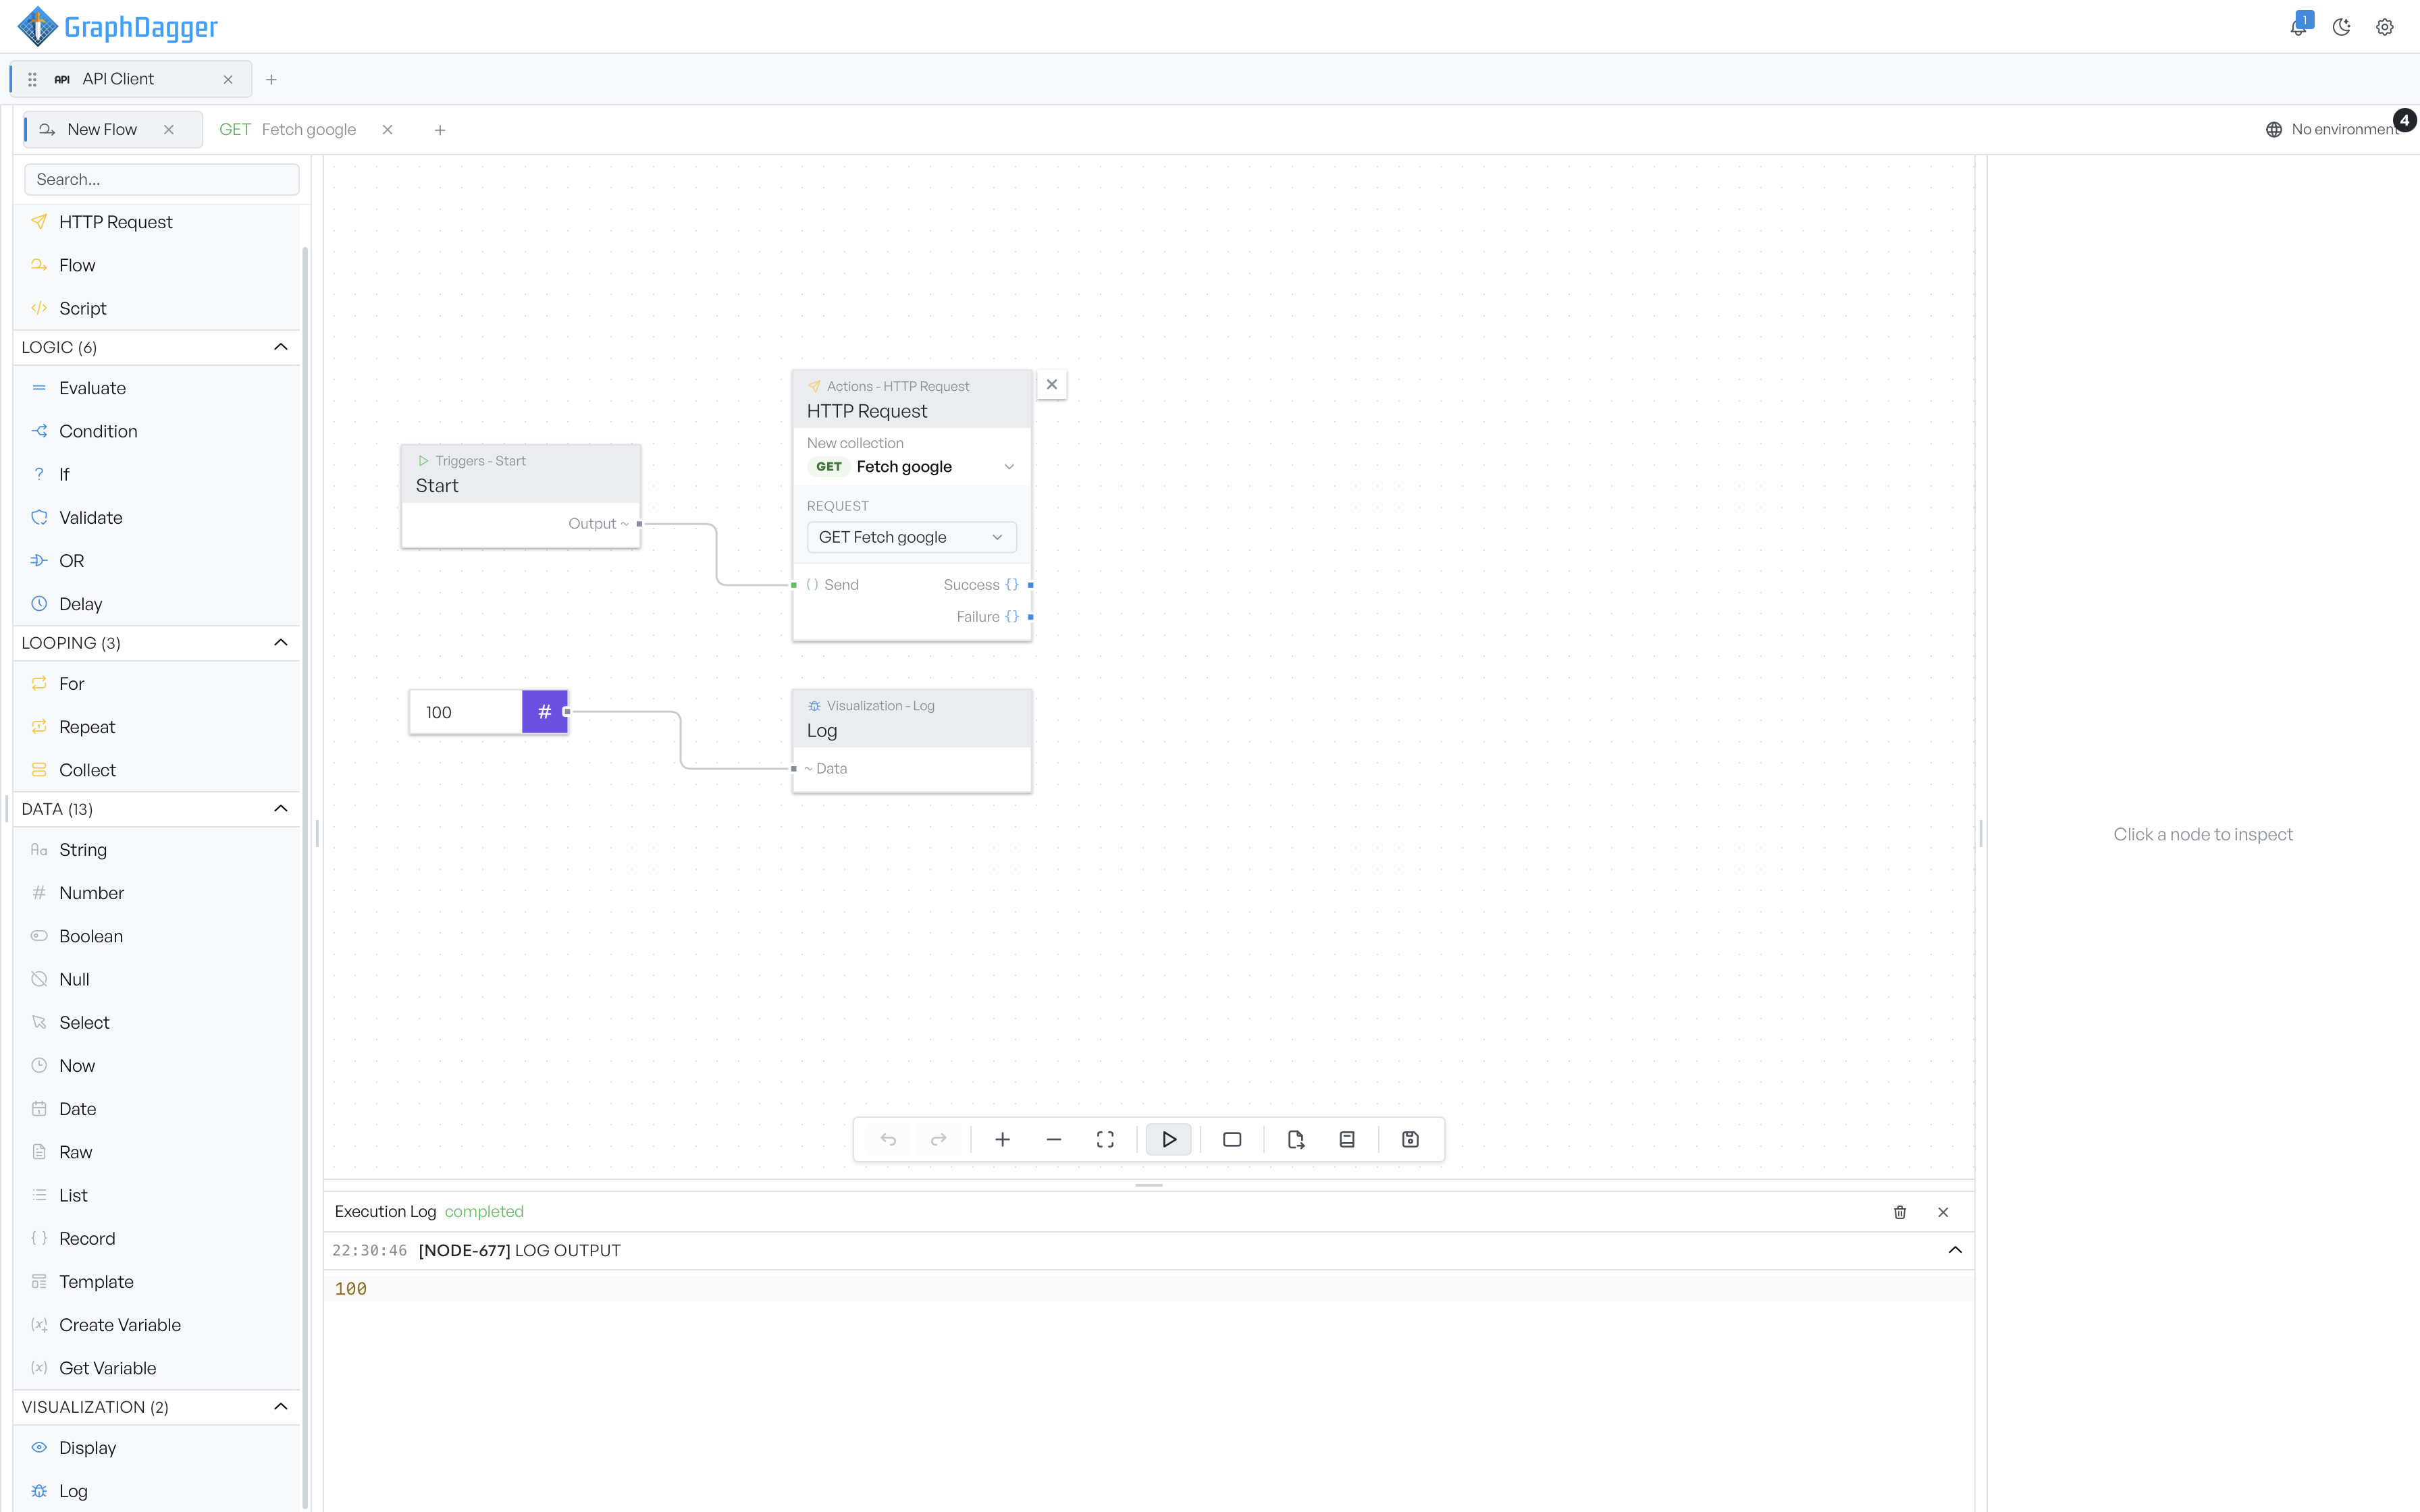
Add a block#
You can add a block in three ways.
- Select it in the catalogue. It lands near the centre of the canvas.
- Drag it from the catalogue and drop it where you want it.
- Right-click the canvas and pick a block from the menu.
The catalogue groups blocks into Actions, Logic, Looping, Data and Visualization. For what each block does, see the reference pages under block categories.
Connect two ports#
Each block has ports: inputs on its left edge and outputs on its right. Drag from an output port to an input port on another block to draw a connection. Data flows from the output to the input when the flow runs.
Ports carry a type, such as a trigger or a value. The block reference lists the ports and types for any block, so you can see which outputs feed which inputs.
To remove a connection, select it and press Delete or Backspace.
Configure a block#
Select a block to open it in the inspector. The fields you see depend on the block. See inspector for how the panel is laid out.
Group blocks in a rectangle#
The add-group button on the toolbar drops a coloured rectangle on the canvas. Move blocks onto it to keep a busy canvas readable. A group has a label and a colour you can change in the inspector. Groups are visual only and do nothing when the flow runs.
Remove a block#
Select a block and press Delete or Backspace. The canvas removes the block and its connections. The Start trigger is protected. You cannot delete it.