Build the action pipeline#
Actions run in the order you drag them into the pipeline, and a final action ends the run for that request.
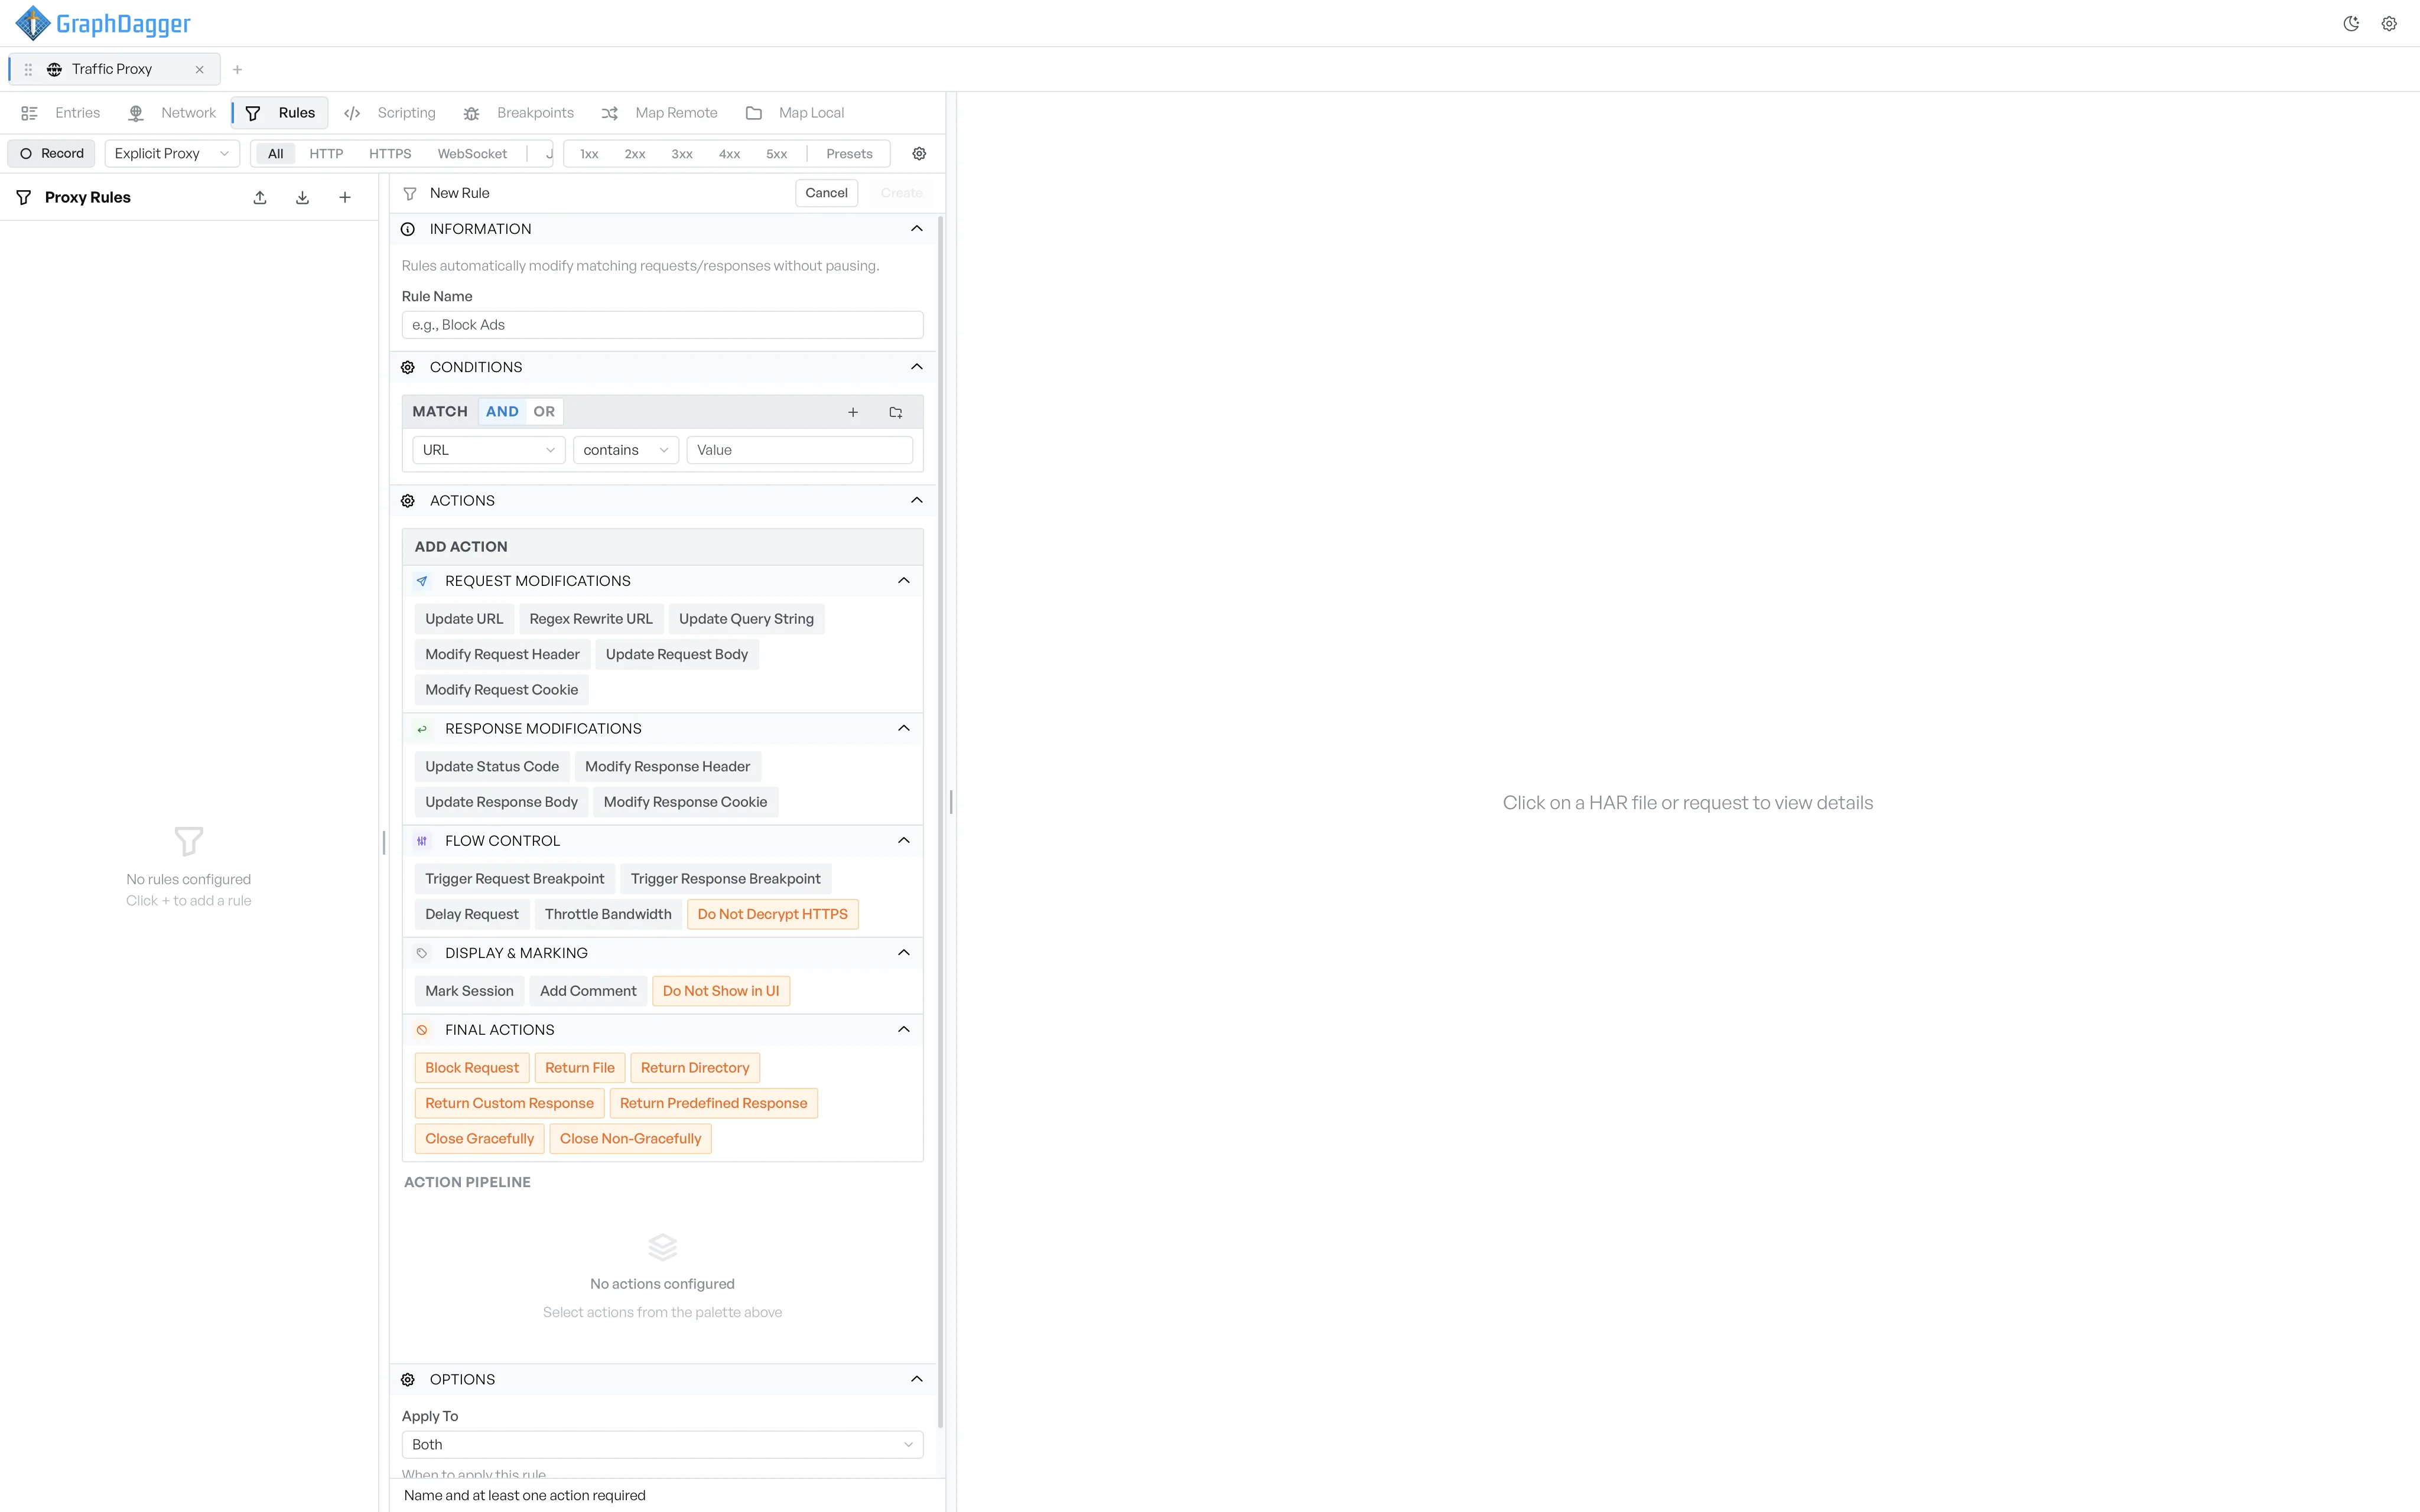
The Actions section of a rule has two halves: a palette of action categories at the top, and the pipeline of configured actions at the bottom. Select an action in the palette to add it to the pipeline.
Configure an action#
An action in the pipeline expands into a row with its own inline settings. For example, Update Status Code has a Status input for the numeric code and a Status Text input for the reason phrase. Different actions show different inputs: a header name and value, a regex pattern, a content body, a file path, and so on.
Reorder or remove an action#
Each pipeline row has a drag handle on the left and a trash icon on the right. Drag a row to change the order, and drop it anywhere in the pipeline. Select the trash icon to remove a row.
Continue to next rule#
Beneath the pipeline, a Continue to next rule checkbox controls what happens after this rule runs.
- Off: rule processing stops for this request after this rule runs.
- On: later rules can also match the same request and run their own pipelines on top.
This matters when several rules can apply. A stop after the first match is the usual choice. Use the chain-on setting when you want to layer transforms.
What a final action stops#
A few actions are marked final in the action categories. A final action stops the pipeline for this request even if Continue to next rule is on. These actions send the request or the response on its way: they block, they return a canned response, or they close the connection. Anything after them never runs.