Switch between queued files#
Search the left-hand list, open an archive into its nested entries, and reveal, re-analyse, or remove any file you have added.
The queue is the left-hand list of every file you have added to this tab. It tracks state, switches between files, and gives you per-file actions.
Search the queue#
The search field filters the queue by file name, SHA-1, or tag. The match ignores case and runs against every visible row.
The plus button in the header opens the same file picker as Choose File. Use it to add another file without a return to the empty state.
What each row shows#
Each row shows the file name, the detected type and size, and the time you added it. A folder row shows a count of the items nested inside it.
A highlighted background marks the active file.
Nested archive rows#
The queue shows archives and folders as parent rows, with their entries indented underneath. The chevron on a parent row toggles the children.
When you select a nested entry, the Container context section in the Overview tab marks that entry with ← YOU ARE HERE. From there you can jump back to the parent or across to a sibling.
Reveal, Re-analyze, and Remove#
Hover a row and open its actions menu from the … button. The same actions sit on a right-click context menu.
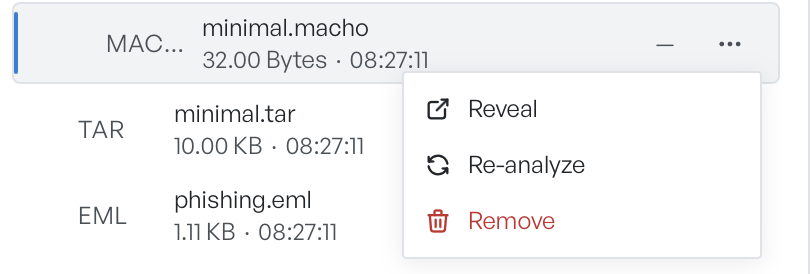
- Reveal opens the parent folder of the file in your file manager. Use it to find the original sample on disk.
- Re-analyze runs the default pipeline again. Use it after you edit a YARA rule, or to refresh a stale result.
- Remove drops the file from this tab's queue. It does not touch the file on disk. When you remove an archive parent, File Triage removes its nested entries too.
Select a different file#
Click any row to make it the active file. The centre tabs reload around that file. If File Triage has not analysed the file yet, the default pipeline starts at once, and the centre column shows progress until the first results arrive.