Label features on the map#
Draw text from a property beside each feature, and set its size, halo, placement, overlap, and minimum zoom.
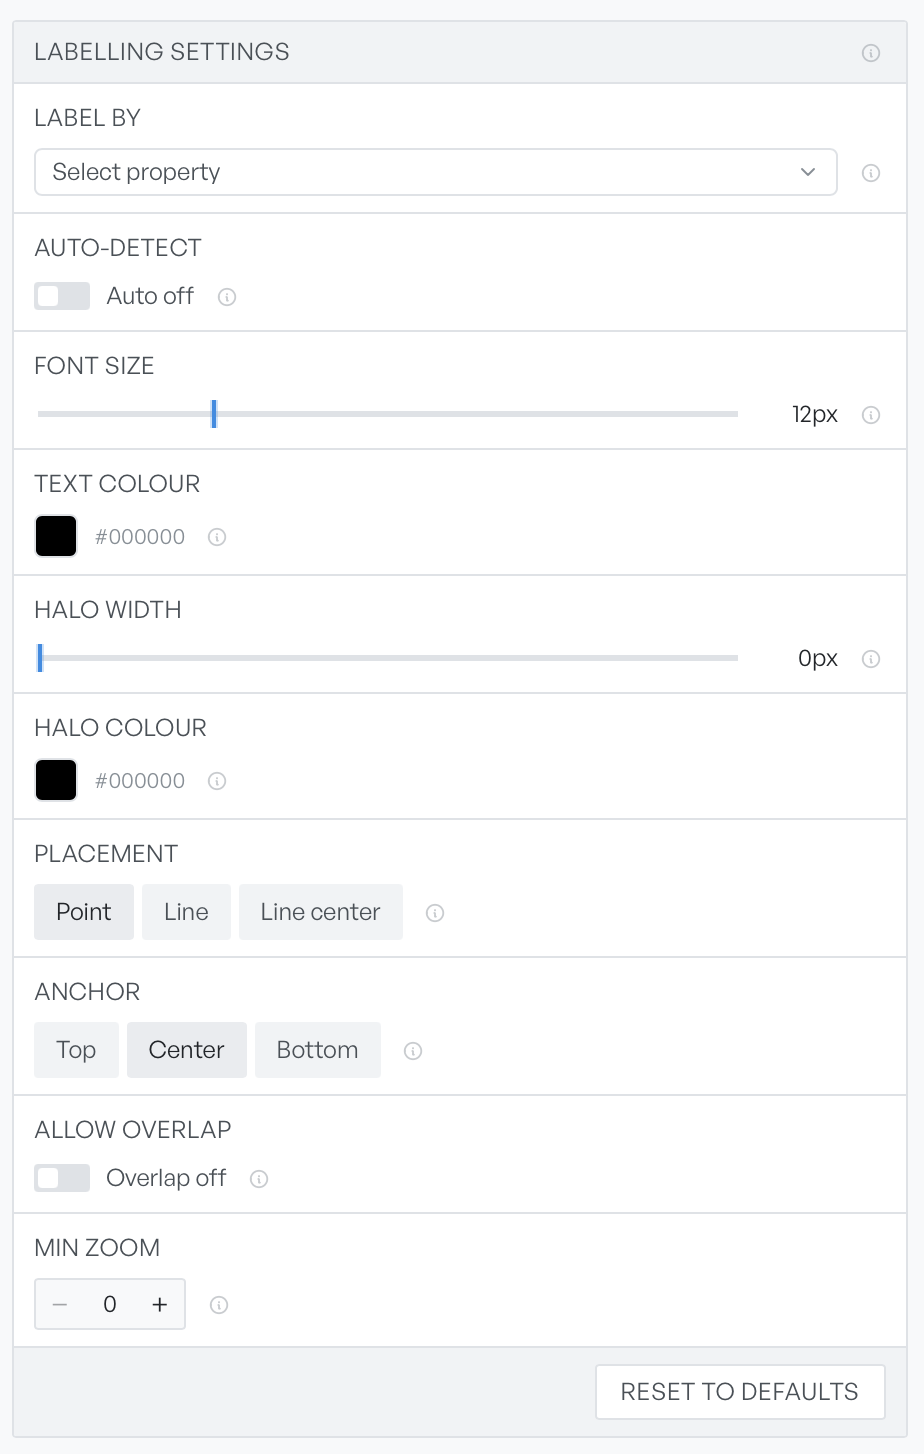
Labelling draws text on the map from a property of each feature, so a layer of polygons stops being anonymous shapes and starts to name itself. Pick the property under Label by, and the layer labels itself. Turn on Auto-detect and Geo Map picks a sensible property for you.
Make labels readable#
Three controls set how a label reads:
- Font size: sets the text size. Range 8 to 24 pixels (default 12).
- Text colour: follows the theme, black on light and white on dark.
- Halo width: draws a contrasting outline behind each character. Range 0 to 3 pixels in half-pixel steps (default 0).
Halo width is the control that matters most over a busy basemap. A one-pixel halo in the opposite colour to your text keeps labels legible over coastlines and roads, and it does not make them heavier.
Where labels sit#
Placement decides how a label follows its feature.
- Point: puts the label at the feature's centre.
- Line: runs the label along the path.
- Line center: puts a single label at the midpoint of the line.
Anchor then nudges a point label to sit above, on, or below its feature. Geo Map hides Anchor for annotation layers, which rotate about their own centre instead.
Two more controls decide what happens when labels crowd each other:
- Allow overlap: off, Geo Map hides colliding labels, so you see fewer labels but each one is readable. On, it draws everything, and labels may sit on top of each other.
- Min zoom: hides labels until this zoom level. Range 0 to 22.
Leave Allow overlap off unless you need every feature named. Min zoom is the way to keep a dense layer usable: label nothing at world scale, and let the names appear as someone zooms into the area they care about.
Reset to defaults at the foot of the card puts every control back.
Note At most 500 features per layer are labelled. The layer still draws in full; beyond that count, not every feature gets text.