Make a signed JWT#
Type claims into the editor, pick a signing algorithm and lifetime, and get a compact token you can paste into a request.
The JWT generator signs whatever claims you put in the editor and hands back a compact token you can paste into a request.
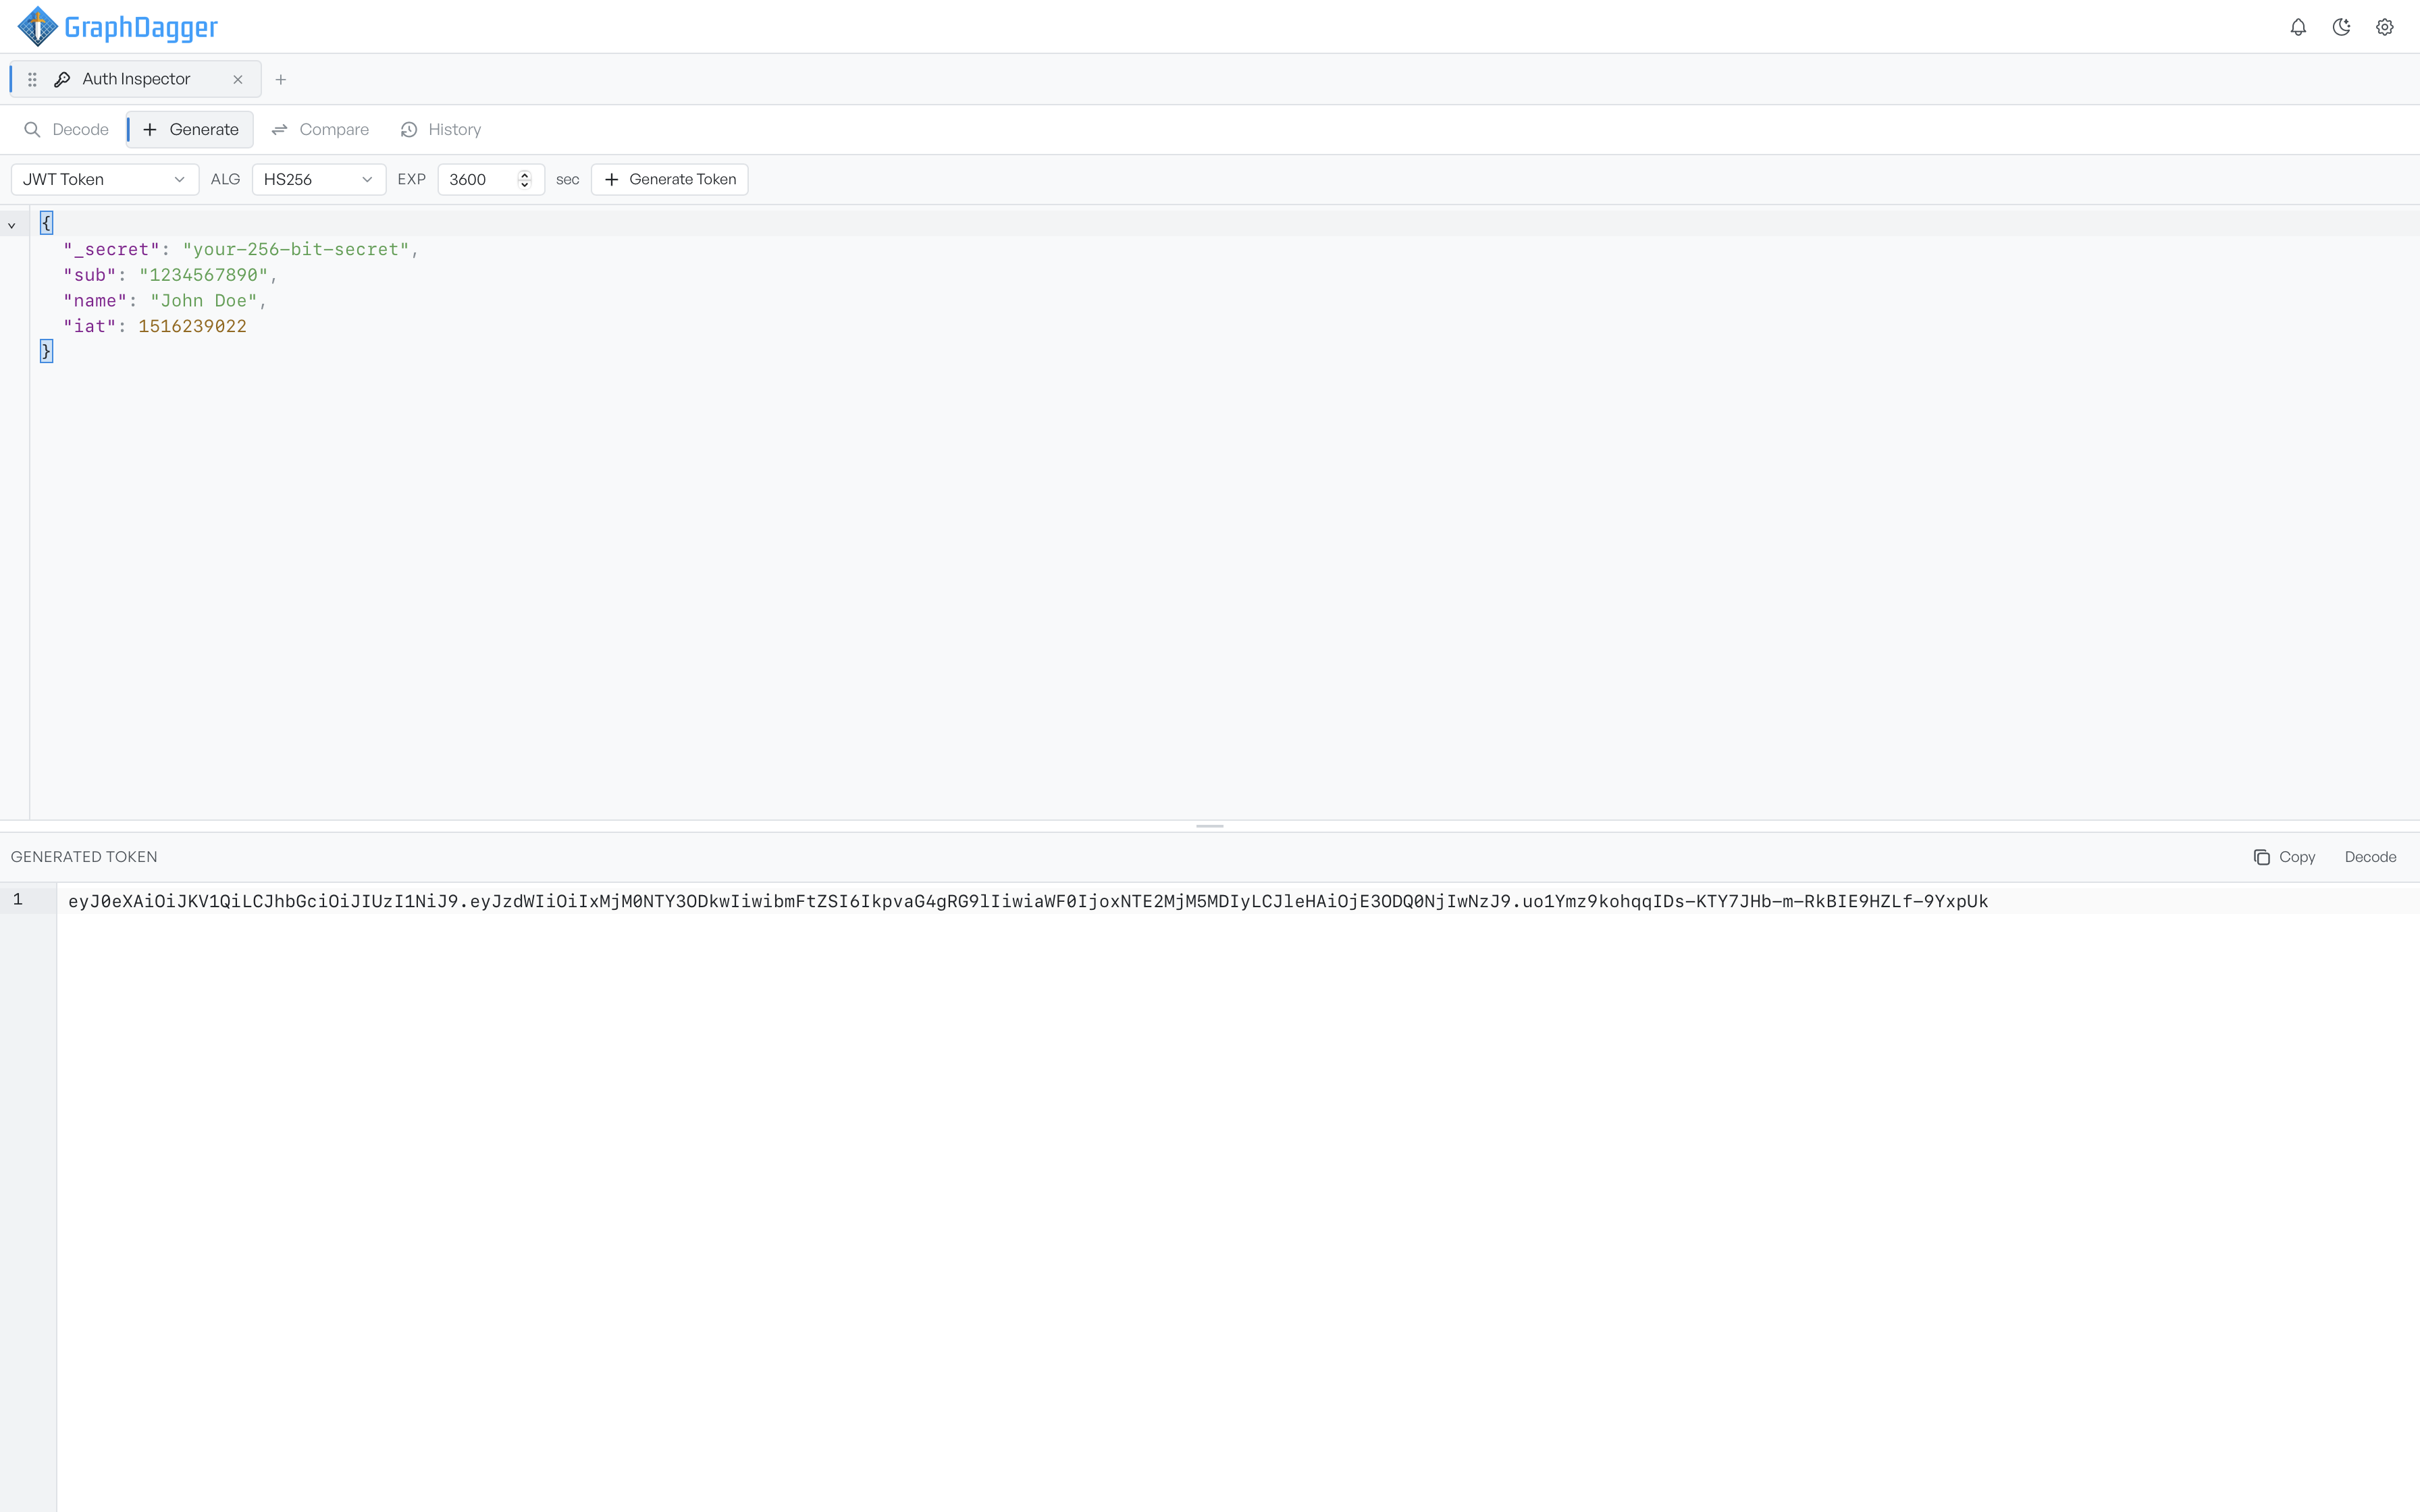
Claims and the signing secret#
The editor holds the payload. Every key becomes a claim, so you add roles, scopes, or a tenant identifier by typing them in.
One key is special. _secret sets the signing secret. Auth Inspector strips it out before it signs, so it never appears as a claim in the finished token. It applies only to the HMAC algorithms, HS256, HS384, and HS512.
Set the algorithm and expiry#
Two toolbar controls set how the token is signed and how long it lasts:
- Alg: chooses the signing algorithm from the eleven supported.
- Exp: sets the lifetime in seconds from now. Default 3600, which is one hour. Set it to zero to omit the expiry claim entirely.
An Exp of zero is the quickest way to produce a token that never expires and see whether your service accepts it.
An asymmetric algorithm, anything that begins RS, ES, or PS, changes the editor. Auth Inspector generates a key pair, and the workspace splits into three panes: the claims, an editable private key, and the matching public key. Give the public key to whatever verifies the token. Select Regen Key on the toolbar for a fresh pair.
Read the signed token#
Select Generate Token, and the result appears in the Generated Token panel at the bottom. Copy takes it to the clipboard. Decode sends it into the Decode mode. Do that at least once: it confirms the claims came out as you intended, and the security audit tells you what a reviewer would say about the token you have made.
If the signing fails, for example because the payload is not valid JSON, a notification reports it. Auth Inspector does not produce a broken token.